

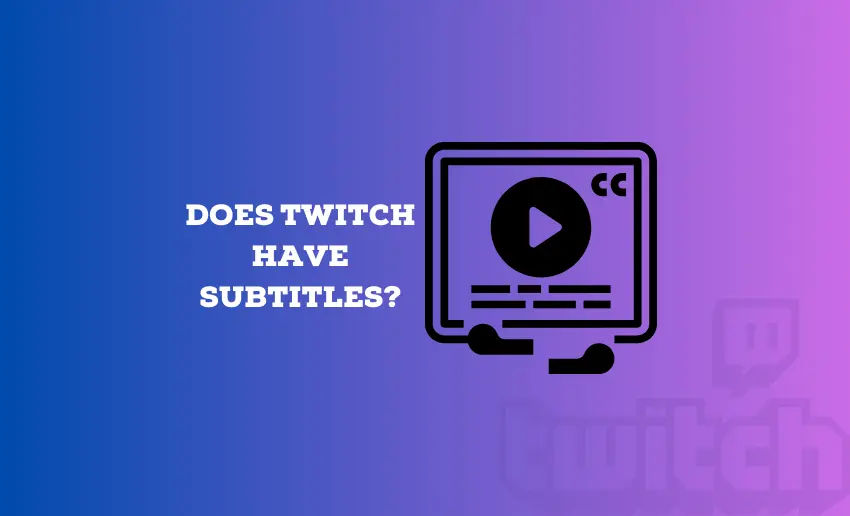
For avid online streamers and gaming fanatics, the Twitch platform is home to countless creators who share their content with a global audience. It’s a place where creative minds converge to connect and entertain. But in this multitude of video content, it’s not rare to hear the question: does Twitch have subtitles?
These textual companions to videos can make content accessible to a broader audience, including those with hearing impairments or those who simply prefer to read along. This piece will provide all the answers you need to know about Twitch captions and if its available.
Can you get subtitles on Twitch?
Yes, videos on Twitch can be enabled with closed captions or subtitles. Once enabled, the spoken words you hear during a stream appear as text on the screen. This means the audience can follow what’s being said, even in the noisiest moments.
While Twitch does not expressly call it a subtitle, it does offer a feature known as closed captions. This powerful tool improves accessibility and user experience. Whether you’re a content creator or a viewer, it adds a whole new dimension to your Twitch journey.
Twitch doesn’t discriminate when it comes to closed captions. They can be added to all video content and live streams, making the platform more inclusive. Furthermore, the beauty of Twitch closed captions is that they can be generated live. This real-time transcription ensures that viewers can keep up with the action as it unfolds.
How to get subtitles on Twitch
To use the closed captions on Twitch as a viewer, follow these steps:
- Open the Twitch platform on your device;
- Locate the video or livestream you wish to watch;
- Click on the CC button on the bottom right corner of the video player just before the settings button;

- This will turn on your subtitle, and you can read on as your video plays.
In addition to this, Twitch also allows viewers to make some adjustments to the way and manner a closed caption is displayed:
- Click the Gear Icon on the video player;
- Select Closed Captioning from the Options displayed;
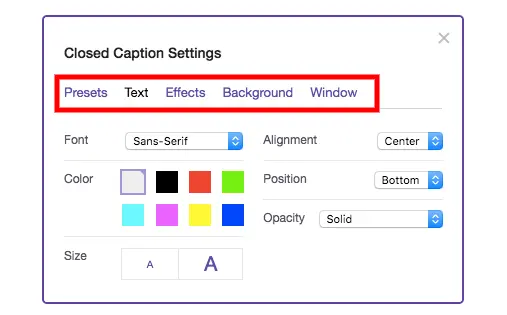
- Viewers can play around with various settings within the interface, including preset, text, effects, background, and window. All of these can be fine-tuned individually.
When you activate or deactivate captions or adjust the display settings on Twitch, your preferences will be automatically saved for your future viewing of caption-supported content.
Are closed captions available on all Twitch videos?
No, subtitles are not automatically available on all Twitch videos. Subtitles, also known as closed captions, depend on the efforts of the content creator to enable and provide them.
Twitch offers features and extensions that allow streamers to add subtitles to their streams. Still, it’s up to the individual streamer to decide whether or not to utilize these tools to make their content more accessible. This means the availability of subtitles on Twitch videos varies from stream to stream and is at the discretion of the content creator.
How to tell if a Twitch video has subtitles?
A viewer can determine if subtitles are available on a Twitch video by looking for the closed caption (CC) icon or a “CC” label typically located on the video player interface.
Look for a small CC icon within or near the video player controls. This icon signifies the presence of closed captions. Alternatively, streamers include information about closed captions in their stream descriptions or titles. Be sure to read the stream details for any mention of subtitles.
How to add captions to Twitch streams
There are a couple of ways to add subtitles to your Twitch video. Twitch content creators can use a third-party platform to add subtitles or use Twitch extension services. This creates room for choice, depending on which is convenient. Here is how to use both methods:
1. Using Stream Closed Captioner Extension
The Stream closed captioner extension is one of the best twitch closed captions extension
- Navigate to the Twitch Creator Dashboard;
- Head over to the author dashboard’s extensions section, and in the upper left corner’s search box, type “stream captions” to find what you need;
- Find the “Stream Closed Captioner” extension and activate it;
- Set it as “Overlay 1;”
- Once activated, go back to your dashboard;
- Click on “Caption Settings” within the Stream Closed Captioner extension;
- Enable “Profanity Censoring” if desired;
- Turn on “In-Chat Reminder” to prompt viewers to enable captions after a few minutes;
- Create a block list for specific words to be censored;
- Click “Save” to apply your settings;
- Click the “Start Captions” button in the extension;
- Allow browser microphone access if prompted;
- The captions will start appearing on your stream as you speak;
- Keep an eye on the captions to ensure accuracy and readability;
- Make adjustments as needed to provide the best viewer experience;
- Start your Twitch stream as usual;
- Viewers can now enjoy closed captions by clicking on the captions box.
It’s crucial to remember that you are responsible for all the content that appears on your broadcast, including captioned content. Using the Closed Captioner twitch subtitle extension in any way that violates Twitch’s Community Guidelines or Terms of Service can lead to a suspension of your Twitch account.
2. Using Closed Captioner for Streams
Alternatively, Twitch users can integrate closed captions into their Twitch stream using the Closed Captioner for Streams extension. Here is how to do it:
- Begin by installing the Closed Captioner for Streams extension;
- After installing the extension, add it to your Twitch account;
- From the Twitch Author Dashboard, navigate to “Extensions” and select “My Extensions.”
- Search for “Closed Captions for Streams” within your extensions.
- Click on it and select “Enable.”
- A drop-down menu will appear, allowing you to choose where the subtitles will be inserted into your stream;
- On the dashboard, choose your preferred language or dialect for the captions;
- Once you configure your settings, click “Start” to generate subtitles for your Twitch stream.
If you’re a broadcaster looking to provide captions to your viewers, it’s essential to understand how to transmit caption files in an accepted format. To make your captions accessible, you’ll need to transmit caption files in specific accepted formats. Twitch’s Live Closed Captions system supports captions in line 21 CEA-708/EIA-608 format and CC1 NTSC field 1.
3. Using Webcaptioner
Webcaptioner is a handy online tool that can generate captions based on audio input, and it displays subtitles directly in your web browser. Here’s a step-by-step guide on how to use it for sending closed captions to your Twitch livestream:
- Head to the Webcaptioner homepage;
- Click on the “Start Captioning” button;
- A blank page will open;
- Locate the three dots icon at the bottom right of the page and click it;
- From the menu that appears, select “Settings.”
- In the settings menu on the left side, click “Languages.”
- Set the language to English (or the language you will use during your live stream);
- Close the settings menu;
- Click on the “Start Captioning” button;
- At this point, what you say should start appearing in the browser window as captions;
- Click on the three dots icon at the bottom right again;
- This time, select “New Window,” which is represented by the central icon with two pages just above the “Settings” button;
- In your streaming software, capture the new Webcaptioner window you just created;
- Place and crop it as needed to fit seamlessly into your stream.
It’s important to highlight that this approach creates open captions, which are permanently visible to viewers and cannot be disabled. Notwithstanding, Webcaptioner offers extensive customization options, allowing you to adjust colors, fonts, text size, and spacing between letters and lines to meet your preferences.
Finally
Subtitles on Twitch are not just words on a screen; they are a pathway to a more inclusive, engaging, and diverse community. For viewers with hearing impairments, non-native speakers, or those who simply prefer to read along, subtitles bridge the communication gap and enhance the viewing experience. Thankfully, there is no shortage of ways to get captions to your Twitch video; find one that suits you and employ it.